Quick Answer: Quick Answer: Oyster mushroom grow kit contamination commonly arises from molds like trichoderma, bacteria, and cobweb mold, often caused by improper moisture or temperature conditions. Fixing contamination involves isolating affected areas, adjusting humidity and temperature, and applying proper sterilization techniques to prevent spread and ensure healthy mushroom growth.
What Are the Common Causes of Contamination in Oyster Mushroom Grow Kits?
Contamination in oyster mushroom grow kits is one of the most frequent challenges that cultivators face. Several factors contribute to these undesirable microbial invasions. The three most common types of contamination are trichoderma (a blue-green mold), bacterial contamination characterized by slimy wet patches and sour odors, and cobweb mold, which appears as gray, wispy, and rapidly spreading growths. These contaminants disrupt the healthy growth of oyster mushrooms and often lead to crop failure if not promptly addressed. According to Fungi Academy, these are the predominant contamination types to watch for during cultivation.
One of the primary causes of contamination is improper moisture levels, particularly overwatering. Excessive moisture creates a breeding ground for bacteria and molds, especially in the substrate where oyster mushrooms grow. Merry Hill Mushrooms highlights overwatering as a key factor in contamination development, emphasizing the importance of maintaining balanced moisture without saturation.
Temperature fluctuations and unsuitable temperature ranges also contribute significantly. Oyster mushrooms thrive best at temperatures between 18-19°C, with a tolerable range of 14-21°C. Deviations outside these limits can stress the mycelium, making it more vulnerable to pathogens. Prolonged exposure to improper temperatures can encourage the growth of contaminants like trichoderma, which is known as the causal agent of green mold disease in mushroom production (NIH).
Other causes include poor hygiene during spawning and handling, inadequate sterilization of substrate materials, and insufficient air circulation, all of which can introduce or promote the growth of contaminating organisms.
How Can You Identify Different Types of Contamination?
Recognizing contamination early is critical to prevent the spread and loss of your oyster mushroom crop. Each contamination type exhibits distinct visual and olfactory signs that can help growers diagnose the problem.
Trichoderma Mold (Green Mold): This mold manifests as blue-green patches on the substrate surface. It is fast-spreading and aggressive, often outcompeting mushroom mycelium. Once visible, trichoderma spores have already proliferated extensively, making eradication difficult. According to NIH, two species, Trichoderma pleurotum and Trichoderma pleuroticola, specifically infect oyster mushrooms.
Bacterial Contamination: Typically identified by slimy, wet patches on the substrate and an unpleasant sour or rancid smell. Bacterial contamination often appears as dark or wet spots and can cause the substrate to rot. Fungi Academy notes that Bacillus species are common bacterial culprits.
Cobweb Mold: Presents as a grayish, wispy, and cotton-like mold that spreads rapidly across the substrate. It can smother young mushroom pins and is often encouraged by overly humid and poorly ventilated environments.
Other signs to watch for include discoloration such as black or pink spots. Immediate isolation and removal of affected areas are crucial to prevent further spread. Le Petit Champi recommends cleaning with diluted hydrogen peroxide and increasing ventilation if such spots appear.
What Are Effective Methods to Prevent Contamination?
Preventing contamination starts before the oyster mushroom kit is even set up. Using sterile substrate and spawn is essential. Soaking grains for 12 to 24 hours at room temperature before sterilization can help bacterial endospores germinate and become vulnerable to heat treatment, reducing bacterial contamination risks (Fungi Academy).
Proper sterilization techniques are vital during the spawning phase. Immersing substrate material in hot water at 60°C for 30 minutes or soaking in alkalinized water for 36 hours has proven effective in reducing trichoderma contamination (NIH).
Maintaining ideal environmental conditions is another crucial prevention strategy. Keep the temperature between 18-19°C and humidity levels between 80-95% to promote healthy oyster mushroom growth and discourage contaminant proliferation (Merry Hill Mushrooms, BootstrapBee).
Regular cleaning of grow areas, tools, and hands can minimize the introduction of contaminants. Using clean water and sterilized equipment reduces the risk of bacterial and mold spores entering the grow kit. Additionally, ensuring good airflow reduces humidity pockets where molds like cobweb mold thrive.
How Can Contaminated Grow Kits Be Treated or Salvaged?
Once contamination is visually detected, immediate action is necessary to protect the rest of the mushroom crop. For minor contamination, such as small isolated spots, carefully removing the affected area and discarding it may help contain the problem.
Cleaning the surrounding substrate with a diluted hydrogen peroxide solution can reduce microbial load as recommended by Le Petit Champi. Increasing ventilation and reducing excessive humidity will also limit mold spread.
However, for serious contamination like extensive trichoderma infestation, salvage attempts are generally not advised. According to MycoLogic Solutions, by the time trichoderma mold is visible, millions of spores have been released. Attempting to cut away or burn the infected substrate risks disturbing spores and spreading contamination further.
In such cases, it is best to safely discard the contaminated grow kit, thoroughly clean the growing environment, and begin anew with sterilized materials. Prevention and early detection remain the most effective strategies to avoid this loss.
What Are the Ideal Growing Conditions to Minimize Contamination?
Creating the right environment for oyster mushrooms is key to preventing contamination. Optimal temperature and humidity, combined with proper lighting and airflow, promote vigorous mycelium growth and outcompete contaminants.
Temperature: Maintain 18-19°C for optimal growth, with an acceptable range of 14-21°C. Temperatures outside this range can stress the mycelium and encourage mold growth (Merry Hill Mushrooms).
Humidity: Keep relative humidity between 80-95%. Too low humidity can dry out the substrate, while too high can favor molds like cobweb mold (BootstrapBee).
Light: Oyster mushrooms need at least 4-6 hours of indirect light daily to grow properly. Light stimulates proper fruiting and development (BootstrapBee).
Airflow: Good ventilation is essential to remove excess carbon dioxide and prevent stagnant, humid conditions that favor mold growth. Gentle airflow also helps maintain consistent temperature and humidity.
How Do You Maintain Proper Humidity and Ventilation?
Maintaining balanced humidity and ventilation requires careful monitoring and adjustments throughout the cultivation process. Using a hygrometer to track relative humidity allows you to keep levels within the ideal 80-95% range. Misting the grow kit or grow area with water can increase humidity, but avoid overwatering, which can promote bacterial contamination and substrate rot (Merry Hill Mushrooms).
Ventilation can be improved by using small fans or opening windows to allow fresh air exchange. However, avoid direct drafts on the grow kit to prevent drying out the substrate. Positioning the grow kit in a well-ventilated room with indirect airflow is ideal.
Regularly inspecting the grow environment and adjusting humidity and airflow based on seasonal or weather changes helps prevent conditions that encourage contamination.
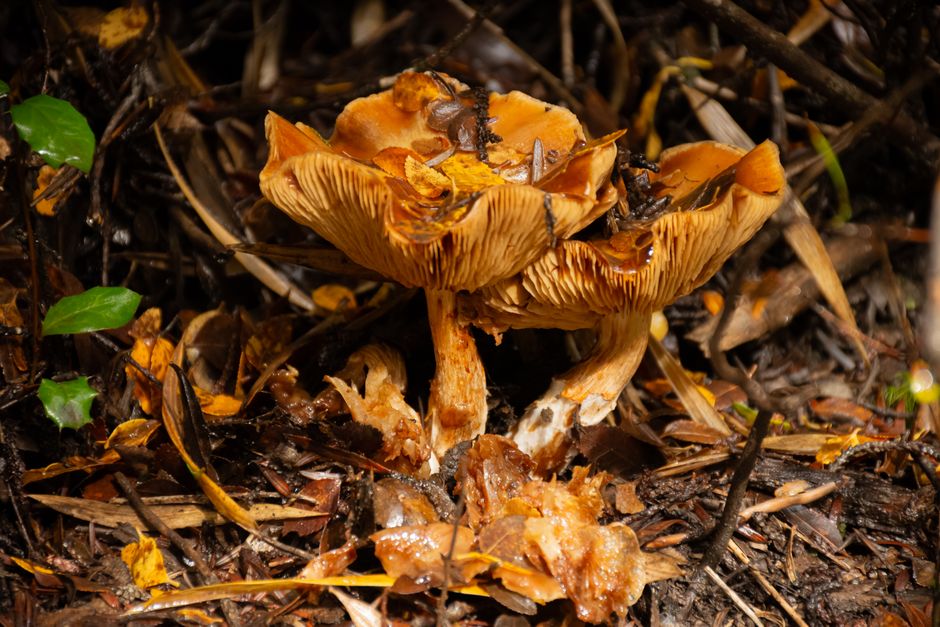
 Close-up view of oyster mushroom gills showcasing their delicate and intricate structure.
[Shop Related Products on Amazon](https://www.amazon.ca/s?k=Oyster+Mushroom+Grow+Kit+Contamination:+Causes
Frequently Asked Questions
What should I do if I see green mold on my oyster mushroom kit?
If you notice green mold, likely trichoderma, immediately isolate the affected kit to prevent spores from spreading. Avoid disturbing the mold as this can release spores. It is often best to discard the contaminated kit safely and clean the area thoroughly (MycoLogic Solutions).
Can I save a grow kit with bacterial contamination?
Bacterial contamination usually manifests as slimy wet patches and sour smells. Minor contamination may be managed by removing affected areas and improving ventilation and dryness, but if the bacterial infection is widespread, discarding the kit is safer to avoid further spread (Fungi Academy).
How often should I mist my oyster mushroom grow kit?
Misting should be done to maintain humidity without overwatering. Typically, mist lightly once or twice a day depending on ambient humidity, ensuring the substrate stays moist but not saturated, as overwatering encourages contamination (Merry Hill Mushrooms).
Is it normal for oyster mushrooms to need light to grow?
Yes, oyster mushrooms require at least 4-6 hours of indirect light per day to grow properly. Light helps stimulate fruiting and ensures healthy mushroom development (BootstrapBee).
How can I sterilize substrate to reduce contamination risks?
Effective substrate sterilization includes soaking grains in water at room temperature for 12-24 hours to germinate bacterial endospores, followed by heat treatment such as immersion in hot water at 60°C for 30 minutes or alkalinized water for 36 hours to reduce trichoderma and other contaminants (NIH, Fungi Academy).
Key Takeaways
- Trichoderma, bacteria, and cobweb mold are the most common oyster mushroom grow kit contaminants (Fungi Academy).
- Maintaining temperature between 18-19°C and humidity between 80-95% minimizes contamination risks (Merry Hill Mushrooms, BootstrapBee).
- Proper substrate sterilization, including soaking and heat treatment, reduces bacterial and mold contamination (NIH, Fungi Academy).
- Isolate and discard heavily contaminated kits to prevent spore spread; minor contamination may be managed by removing affected areas and cleaning (MycoLogic Solutions).
- Good ventilation, balanced watering, and appropriate light exposure help maintain healthy oyster mushroom growth and prevent contaminants (BootstrapBee).